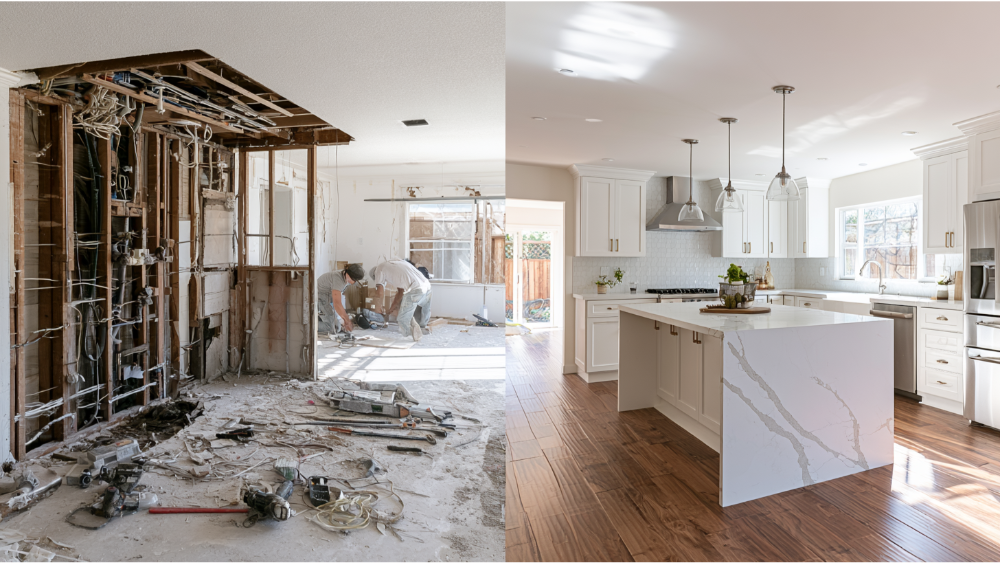
A full kitchen remodel follows a precise sequence where active on-site construction commonly runs 6 to 12 weeks, though the overall start-to-finish lifecycle spans 3 to 6 months due to architectural design, local permitting, and material lead times. Delays are most frequently caused by mid-project changes and long-lead items like custom cabinetry, which requires 8 to 15 weeks for production and must be ordered before demolition begins. Additionally, stone countertops require a built-in fabrication wait as they must be templated from physical, fully installed cabinets. For local projects, the 2025 California Building Standards Code (Title 24) dictates strict structural and energy compliance, while the CSLB legally caps down payments at 10% or $1,000, whichever is less.
A kitchen remodel moves through a fairly predictable sequence: planning, design, material selections, a written scope, permits, ordering, demolition, rough plumbing and electrical, inspections, drywall, flooring, cabinetry, countertops, backsplash, appliances, finishing details, and a final walkthrough. Active construction on most full kitchen remodels commonly runs 6 to 12 weeks. The full start-to-finish process, once you count planning, permits, and material lead times, often stretches to several months.
This guide is for the homeowner planning a significant kitchen renovation who wants a clear roadmap, not a sales pitch. You’ll get the real order of events, honest timeline ranges, the decisions you need to make before demolition, and what tends to cause delays. Our view at Revana Homes is simple: a remodel feels manageable when the process is precise before the walls open. Get the plan right early, and the rest of the work follows a path you can actually see. Consider this your plain-language version of kitchen remodels 101: what to expect from start to finish, written for someone comparing options and deciding who to trust.
What a Kitchen Remodel Actually Includes
Before anything else, it helps to know which kind of project you’re describing, because scope drives your schedule, your permits, and how disruptive the work will be. Three broad tiers cover most kitchens.
- Cosmetic refresh. Surface-level updates like new paint, painting cabinets or refinishing their doors, new cabinet hardware, or a fresh backsplash. Layout and systems stay put. This is the shortest, least invasive path.
- Full kitchen remodel. New cabinetry, countertops, floor coverings, appliances, and fixtures, usually within the existing footprint. Plumbing and electrical may shift for new fixture or appliance locations. This is what most people picture when they say “remodel.”
- Layout-changing (structural) remodel. Moving or removing walls, enlarging openings, or reworking the floor plan. This adds framing, more involved permitting, and a longer timeline.
The tier you choose changes everything downstream. A cosmetic refresh may need little or no permitting. A full kitchen remodel with relocated fixtures usually does. A structural change nearly always requires plans and inspections. Careful planning matters most at the top end, but it earns its keep at every level.
We start from a belief that shapes how we approach each project: your kitchen should reflect how you actually live, not a template pulled off a shelf. The way you cook, entertain, store things, and move through the room should guide the kitchen layout. That’s the difference between a kitchen that photographs well and one that works well for years. When we talk scope, we’re really talking about matching the work to your vision and your space, then building it to last.
The Start-to-Finish Kitchen Remodeling Process
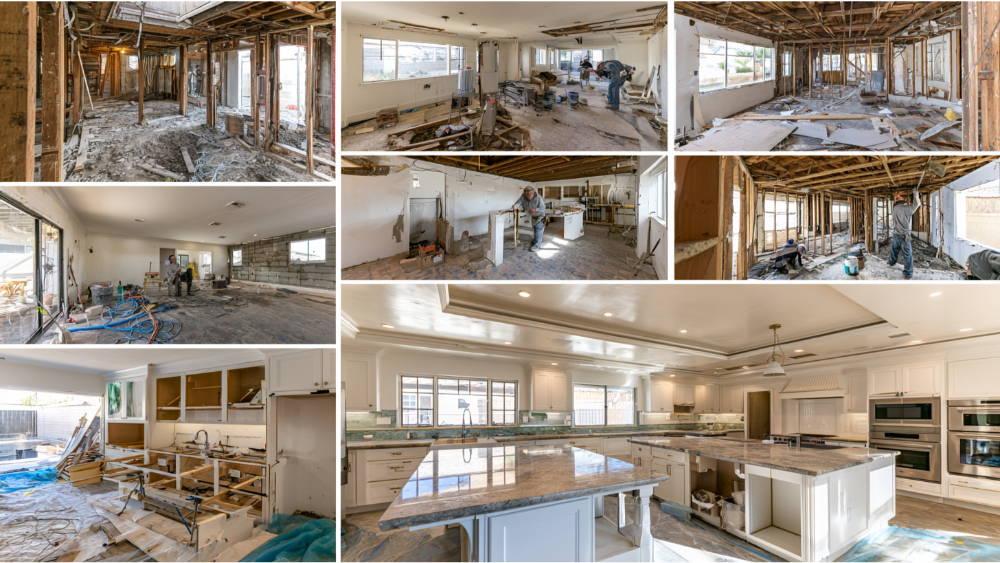
Here are the phases most kitchen remodels move through, roughly in this order. “Roughly” is the honest word. Exact sequencing shifts based on flooring type, cabinet type, inspection timing, and what we find once demolition opens things up. Think of the phases below as the backbone of the kitchen remodeling process, not a rigid script. A little basic knowledge of the sequence goes a long way toward keeping your expectations grounded.
Initial Consultation and Project Discovery
The first step is an initial consultation, not a quote. We want to understand how you use the kitchen: where meals get made, how many cooks are usually in the room, what storage frustrates you, and what you’d keep if you could. This is where we separate must-haves from nice-to-haves and set a realistic scope together.
Many homeowners come in with a Pinterest board and a rough sense of what they want, which is a great starting point. Our job is to align that vision with what’s practical for your home and layout. This is also the moment to decide whether you’re hiring a professional team to manage the entire project or planning to coordinate trades yourself. That single decision affects your timeline, your stress level, and how the phases below get handled. Discovery and early planning typically take 2 to 6 weeks, and it’s time well spent because the decisions made here prevent expensive changes later.
Layout, Design, and Choosing a Kitchen Designer
Once goals are clear, the design phase begins. Working with a kitchen designer or design team, you’ll settle the layout: where the kitchen sink, range, and refrigerator sit, how the work zones flow, and whether a kitchen island fits your space and how you cook. An island is also one of the most effective ways to add more counter space and storage space to a room that feels cramped. Some homeowners also bring in an interior designer to help pull finishes and colors together, though many kitchen projects are handled well by the design team already coordinating the build. Most design professionals build 3D mockups so you can see the room before a single cabinet is ordered. Seeing it in three dimensions is where a lot of “I didn’t picture it that way” moments get resolved on paper instead of on site.
Material selections happen alongside layout, and finalizing them early is one of the best things you can do for your schedule. This is when you choose custom cabinetry, countertop materials, plumbing fixtures, major appliances, and cabinet hardware. Custom kitchen cabinets in particular carry long production lead times, so locking those decisions early keeps the entire project on track.
This is the heart of a kitchen tailored to your space. The choices here decide whether the finished room feels like yours or feels generic. We’d rather spend an extra week getting selections right than watch a mid project change ripple into delays. A dream kitchen isn’t built on impulse; it’s built on decisions made deliberately, before demolition starts. That deliberate approach is what separates a stressful build from a successful kitchen remodel.
Scope, Estimate, and Written Agreement
The written scope and estimate is the document that protects your project. It should describe the work and materials in detail, spell out a payment schedule, and make clear who obtains permits. A clear scope is how honest pricing shows up in practice: when the work is defined precisely, there are far fewer surprises. It’s also the foundation of a realistic project budget, because a number built on a detailed scope holds up far better than a rough guess.
It helps to understand where money tends to concentrate. Cabinetry is often the single largest share of a kitchen budget, frequently in the range of 30 to 40 percent, and labor costs commonly run 15 to 25 percent of the total. We won’t publish a total project range here, because every kitchen is different and a real number comes from a real scope. What we will say plainly: build in a contingency buffer of 10 to 20 percent for the unexpected, because older homes and open walls have a way of revealing surprises. One good way to save money without cutting quality is deciding your priorities early, so the budget goes where it matters most to you.
One more thing worth knowing before you sign anything. A bid that comes in substantially lower than the others usually isn’t a bargain. It often means work was left out of the scope, which turns into change orders and disputes down the road. Working with a quality contractor who defines the scope up front is the surest protection against that. We’ll cover the California contract rules that back this up in a dedicated section below.
Permits, Building Permits, and Schedule Planning
Building permits, where they’re required, and material ordering both happen before demolition, not after. This is the part homeowners most often underestimate. If your project touches electrical, plumbing, or mechanical systems, the permit needs to be in hand before work begins, and local building codes govern what’s required.
Ordering long-lead items early is what keeps a schedule honest. Custom cabinetry can take 8 to 15 weeks to produce and ship. If you wait to order until demolition is done, you’ve built a gap into your timeline where nothing can move forward. This is exactly why the full start-to-finish process runs longer than active construction alone. We plan the ordering and permitting timeline up front so the crew isn’t standing around waiting on a delivery. On larger renovation projects, a project manager keeps these moving pieces coordinated so ordering, permits, and trades all line up on one project timeline.
Home Preparation and Temporary Kitchen Setup
Before the crew arrives, there’s work you can do to make the process smoother. Empty the existing cabinets and clear countertops. Protect adjacent rooms from dust where you can. Most importantly, set up a temporary kitchen somewhere else in the house.
A dining room, a corner of the garage, or a spare room can hold a microwave, a toaster oven, a coffee station, and a bin for dishes and pantry basics. Plan meals in advance for the weeks your kitchen is out of commission. We’ll be honest with you: living through a kitchen remodel involves real disruption. The kitchen will be off-limits for a stretch. Knowing that going in, and preparing for it, makes the whole thing far more bearable.
The Construction Phase: Demolition Begins and Site Protection
Demolition begins where the construction phase starts to feel real. The crew removes the existing cabinets, old countertops, flooring, and appliances, and preps the space down to what stays. This phase usually takes about a week, depending on scope. Once construction begins, your kitchen effectively becomes a construction zone, so keeping household traffic out of it protects both the work and your family.
Dust control and site protection matter more than people expect. Floors and walkways get covered, doorways get sealed off, and debris gets managed so the rest of your home isn’t coated in drywall dust. Demolition is also when hidden conditions tend to surface: outdated wiring, aging plumbing, or water damage behind a wall nobody knew about. We’d rather find those things now and address them properly than paint over a problem. Treating your home with care during the messy stage is part of how we work.
Rough-In Work: Plumbing, Electrical, Mechanical, and Framing
With the space opened up, the behind-the-walls rough in work begins. Plumbing work gets run to new fixture locations. Electrical wiring is roughed in for outlets, lighting circuits, and appliance connections, including any recessed lighting you’ve planned. Mechanical work includes venting for the range hood. If your project involves structural changes, framing happens here too, and any adjustments to structural elements or load bearing walls are handled at this stage.
Electrical work belongs with licensed professionals, full stop. It’s not a place to cut corners, and in most jurisdictions it can’t legally be done otherwise. This phase is also where relocating plumbing fixtures, appliances, or lighting triggers permit and inspection requirements, so the coordination between the crew and the inspection schedule matters. Getting the rough-in right is what makes everything visible later sit exactly where it should. This stage kicks off the longer installation window that spans several phases, commonly 4 to 8 weeks in total.
Inspections
Inspections happen at set points, and they gate the schedule. Rough-in inspections take place before the walls are closed, so an inspector can confirm the plumbing, electrical, and framing meet local building codes. Work can’t continue past that point until the inspection passes. A final inspection comes near the end of the project.
Because inspections have to be scheduled and passed before the next phase starts, their timing directly affects your calendar. We coordinate them into the plan rather than treating them as an afterthought, which keeps the momentum going.
Drywall, Paint, and Surface Preparation
Once rough-in passes inspection, the walls close back up. Drywall goes in, gets taped and finished, and the surfaces are primed and given their base coats of paint. Floors and wall surfaces get prepped for cabinets and flooring to come. Opening the space back up is also a good moment to notice how much natural light the room gets, which can shape final paint and finish choices.
You might wonder why paint happens now if there’s still so much work ahead. The base coats go on while the room is empty and easy to reach. Touch-ups come back at the very end, after cabinets, counters, and hardware are installed and the inevitable minor scuffs from installation are visible. Painting in two passes like this is normal and produces a cleaner result.
Flooring, Cabinet Installation, and Countertops
Now the visible transformation begins. This is also where the classic question comes up: flooring or cabinets first? The honest answer is that it depends on your flooring type and cabinet plan. Tile flooring is often installed before cabinets so the tile runs continuously and cabinets sit on top. Hardwood floors are sometimes installed after cabinets to avoid damage during the rest of the work, or protected carefully if laid first. There’s no single universal order, which is why the plan matters.
Cabinet installation is a milestone. New cabinetry gets set, leveled, and secured, and the room finally starts to take shape. Cabinet doors and drawer fronts go on, and the geometry of your kitchen becomes real.
Countertops follow, and here’s the built-in wait many homeowners don’t anticipate: stone countertops are templated after cabinets are installed. The fabricator measures the exact installed cabinets, then cuts and finishes the stone, then returns to install it. That template-fabricate-install cycle takes time, and it can’t start early because it depends on the cabinets being set. Planning for that gap keeps expectations realistic.
Backsplash, Appliances, Lighting, Fixtures, and Cabinet Hardware
With counters in place, the finishing phase brings the kitchen to life. The backsplash goes up, tying the cabinets and counters together. New appliances are installed and connected. Light fixtures and under cabinet lighting get wired in, and plumbing fixtures like the faucet and disposal are connected. Well-placed under cabinet lighting does more than look good; it makes your counters far easier to work on.
Cabinet hardware goes on, which sounds small but is the detail that makes the whole room feel finished. This is when you get your counter space back and the functional zones you planned start to work the way they were designed to. After weeks of a room in pieces, seeing the kitchen come together in this phase is the payoff for all the planning that came first.
Final Inspection, Final Walkthrough, and Punch List
The final inspection confirms the completed work meets code. Then comes the final walkthrough, which is where our attention to detail earns its place. You and our team go through the kitchen together, checking every element against the plan: cabinet alignment, drawer operation, and whether each fixture is functioning properly against the finish quality you were promised.
Anything that needs attention goes on a punch list. That usually means paint touch ups, minor adjustments, and small refinements. We work through the list until the result matches what we agreed to build. This final stretch typically takes 1 to 2 weeks. For us, the walkthrough is the moment concept-to-completion becomes concrete: the kitchen you pictured, delivered and confirmed together, not handed over with a shrug.
Kitchen Remodel Timeline: How Long Does a Full Kitchen Remodel Take?

This is the question that trips up the most homeowners, because two different clocks are running and people confuse them. There’s active construction time, and there’s the full start-to-finish timeline. Keeping them separate is the single most useful piece of expectation-setting when you’re mapping a kitchen remodel timeline.
Active construction, meaning the weeks the crew is physically working in your home, commonly runs 6 to 12 weeks for a full kitchen remodel. Smaller or more cosmetic projects can land closer to 4 weeks, which is roughly what an average kitchen refresh takes. Roughly, that construction window breaks down like this:
| Phase | Typical duration |
|---|---|
| Planning and design | 2 to 6 weeks |
| Demolition | About 1 week |
| Rough work through cabinets and counters (installation) | 4 to 8 weeks |
| Final touches and walkthrough | 1 to 2 weeks |
The full start-to-finish timeline is longer, often 3 to 6 months, because it includes everything before and after the crew is on site. Design and selections, permit review, and material ordering all add real time. Custom cabinetry alone can take 8 to 15 weeks to produce, which is why ordering early matters so much. That’s the typical kitchen renovation timeline once you account for the parts that happen off site.
What extends the schedule? Late homeowner decisions, long material lead times, permit review timing, inspection scheduling, and hidden conditions found during demolition. What shortens it? Selections finalized early, a clear written scope, and long-lead items ordered up front. On-schedule delivery isn’t luck. It comes from planning the sequence before demolition and communicating clearly at each handoff. When we commit to a timeline, we build it around these realities, not around the number a homeowner wants to hear.
What Sacramento-Area Homeowners Should Know
The kitchen renovation process above applies almost anywhere. But if you’re planning a kitchen project in the Greater Sacramento Area, a few local and California-specific facts are worth having in front of you.
Permits. In the City of Sacramento, permits are required for remodeling and repairs to electrical, mechanical, and plumbing systems. Finish work like painting, tiling, cabinets, and countertops may be permit-exempt on its own, but related work such as relocating an electrical fixture can still require a building permit. The city draws a clear line between non-structural remodels and structural ones. If your project removes or erects walls, or creates or enlarges openings in load bearing walls, it’s treated as a structural remodel with more involved requirements, including electronic plans before a permit is issued.
Building code. The 2025 California Building Standards Code (Title 24) took effect January 1, 2026. Projects submitted for permit on or after that date must comply with the updated provisions. Anyone planning a remodel in this window should confirm the applicable code with the local building department.
Your contract rights. California gives homeowners meaningful protections, and knowing them helps you spot a trustworthy team from an unreliable one. Per the California Contractors State License Board (CSLB):
- A written contract is required for any home improvement project over $500, and all changes must be in writing.
- The down payment is capped at $1,000 or 10% of the contract price, whichever is less, excluding finance charges.
- The CSLB recommends getting at least three written bids based on identical plans and scope, and warns that a substantially lower bid may be missing work.
- Any change to scope or price should go into a written change order, signed before the change becomes part of the contract.
Older homes. A lot of Sacramento-area homes predate 1978, and that matters before demolition. The federal government banned consumer lead-based paint in 1978, so older homes are more likely to contain it. Under the EPA’s Renovation, Repair and Painting Rule, paid professionals disturbing more than 6 square feet of painted interior surface (or 20 square feet exterior) in a pre-1978 home must be certified in lead-safe practices. If you suspect asbestos in old flooring, ceiling material, or pipe wrap that will be disturbed, the EPA recommends having it sampled by a trained, accredited professional first.
How to Prepare Before the Construction Phase Starts
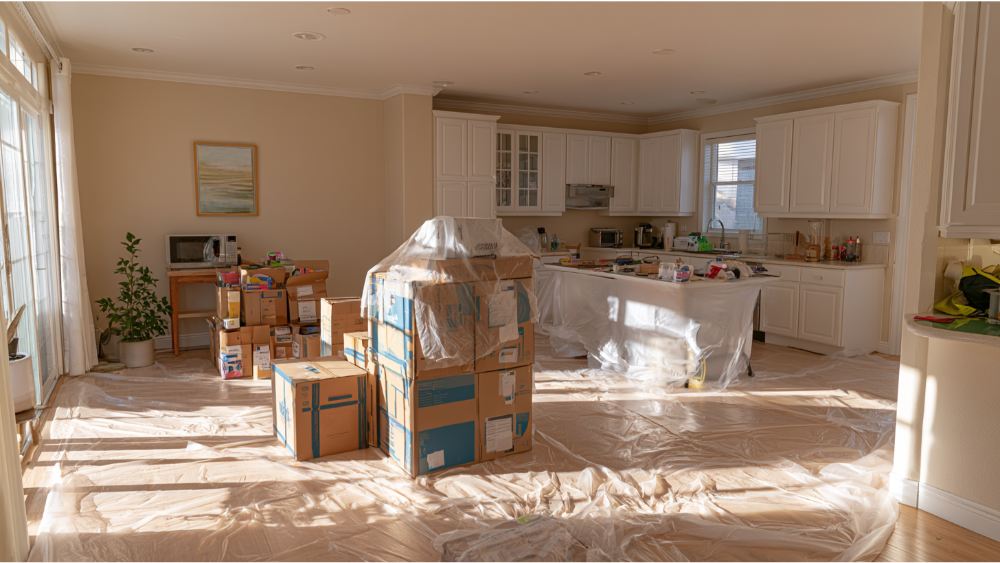
The smoothest renovation projects share one thing: the homeowner was ready when the crew arrived. Here’s what to lock down before demolition day. This is one area where light DIY projects on your end, like clearing and packing, genuinely help the professionals move faster.
- Confirm the scope. Make sure the written agreement reflects exactly what you expect, including who pulls permits and the completion date.
- Finalize major selections. Cabinets, countertops, fixtures, and cabinet hardware should be chosen and ordered. Late selections are the top cause of delay.
- Decide appliance locations. Confirm where each of your major appliances goes, since it drives plumbing and electrical rough-in.
- Empty the cabinets. Clear everything out and box up what you’ll need during construction.
- Set up a temporary kitchen. A microwave, toaster oven, and coffee station in another room will carry you through.
- Plan for the household. Think through pets, kids, parking for the crew, dust protection, and how the team will access the work area each day.
What Causes Kitchen Remodel Delays
Delays rarely come out of nowhere. The usual culprits are predictable, which means most are preventable with good planning.
- Late selections. A cabinet or countertop chosen mid project can stall everything behind it.
- Material lead times. Custom cabinetry runs 8 to 15 weeks. Order late, and the schedule waits on the delivery.
- Permit review. Jurisdiction workload affects how fast plans get approved.
- Inspection timing. Work pauses until each inspection passes.
- Hidden conditions. Outdated wiring, aging plumbing, or water damage found during demolition takes time to fix properly.
- Change orders. Mid project changes add scope and time, which is why we document them clearly before proceeding.
- Structural surprises. Structural changes discovered mid project, like a wall that turns out to carry load, add both scope and inspection steps.
- Countertop templating. Stone can’t be templated until cabinets are installed, then fabricated and delivered, which is a built-in wait no crew can skip.
What a Reliable Kitchen Remodeling Process Should Feel Like

You’ve probably heard a story about a kitchen project that dragged on for months, blew past its budget, or ended up looking nothing like the plan. That fear is reasonable. Here’s what a dependable process should feel like instead.
You should get clear communication at every phase, so you always know what’s happening this week and what comes next. You should have a written schedule and a written scope, so expectations aren’t left to memory or a handshake. You should see honest pricing built on a defined scope, with change orders documented in writing before any change becomes part of the work. And you should feel like the team treats your home with respect: dust controlled, the site cleaned up, and questions answered without runaround.
Just as important, the process should never make you feel like the project is happening to you. A reliable remodeler brings you into the sequence, explains why cabinets get ordered before demolition and why the countertop wait exists, and gives you a single point of contact when something needs a decision. If a contractor can’t explain their process in plain language before the contract is signed, that tells you something about how the project will go after it is.
At Revana Homes, this is the standard we hold ourselves to on every kitchen we build. Precision before the walls open, communication at every handoff, and a finished room that matches the plan you approved. That’s what concept-to-completion means in practice.
Frequently Asked Questions About the Kitchen Remodeling Process
How long does a full kitchen remodel take from start to finish?
Active construction commonly runs 6 to 12 weeks, but the full start-to-finish timeline is usually 3 to 6 months once you include design, selections, permit review, and material ordering. Custom cabinetry alone can take 8 to 15 weeks to produce, which is why the off-site clock runs longer than the on-site one.
Do I need a permit for a kitchen remodel in Sacramento?
If the project touches electrical, plumbing, or mechanical systems, yes. Finish work like painting, tiling, cabinets, and countertops may be exempt on its own, but relocating even a single electrical fixture can trigger a permit. Structural changes, such as removing walls or enlarging openings in load bearing walls, involve more extensive requirements including electronic plans. Always confirm with the local building department before work begins.
Should flooring or cabinets be installed first?
It depends on the flooring type. Tile is often installed before cabinets so it runs continuously beneath them. Hardwood is sometimes installed after cabinets to protect it from damage during construction, or laid first and carefully protected. There’s no universal rule, which is exactly why the sequence should be settled in your written plan before demolition.
Why can’t the countertops be ordered early like the cabinets?
Stone countertops are templated from the installed cabinets, not from drawings. The fabricator measures the actual cabinet installation, then cuts and finishes the stone, then returns to install it. That template-fabricate-install cycle is a built-in wait no crew can skip, so a good schedule plans around it rather than pretending it isn’t there.
What is the biggest cause of kitchen remodel delays?
Late homeowner decisions. A cabinet or countertop selection made mid project stalls everything behind it, especially with custom cabinetry lead times of 8 to 15 weeks. The remodels that finish on schedule are almost always the ones where selections were finalized and ordered before demolition began.