Key Takeaway
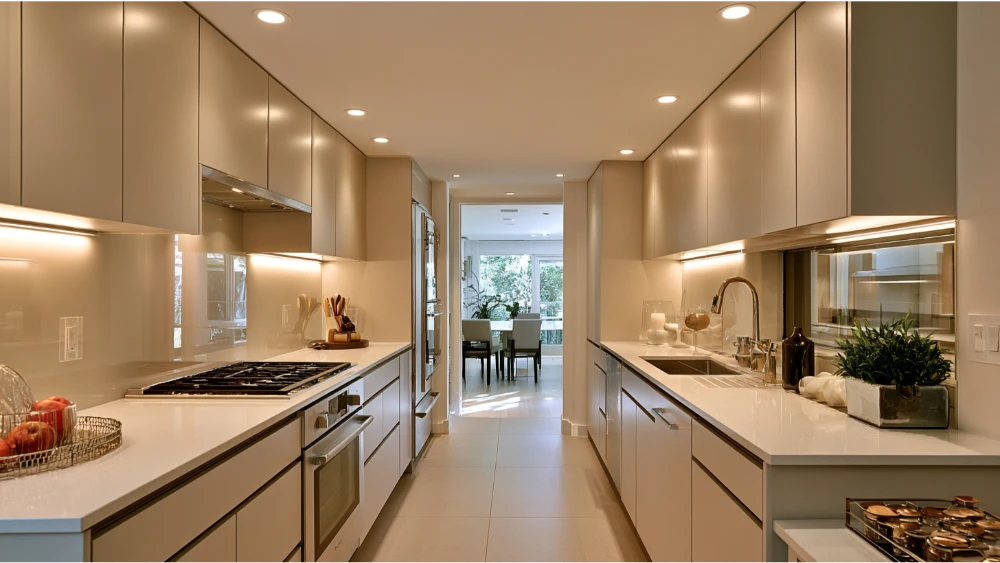
Galley kitchen remodel ideas that open up a narrow space work best when you fix sightlines, lighting, and aisle clearance before adding anything bulky. Aim for a 42-inch work aisle for one cook or 48 inches for two, then layer in lighter finishes, ceiling-height cabinets on one side, and under-cabinet task lighting. A pass-through window or partial wall removal connects the kitchen to an adjoining room and adds the most breathing room for the least structural work.
The best galley kitchen remodel ideas open up a narrow space by fixing sightlines, aisle clearance, lighting, and storage before you add anything bulky. Start with lighter finishes, layered lighting, fewer heavy upper cabinets, vertical storage, and counter-depth appliances. Only after that should you consider a pass through, a peninsula, or partial wall removal. A galley kitchen usually runs long and narrow with cabinets and appliances on both walls, so the smart move is to open it in layers. If your kitchen feels like a corridor you rush through instead of a room you enjoy, this guide walks you through what to change first and what to leave alone.
What Makes a Galley Kitchen Feel Narrow in the First Place?
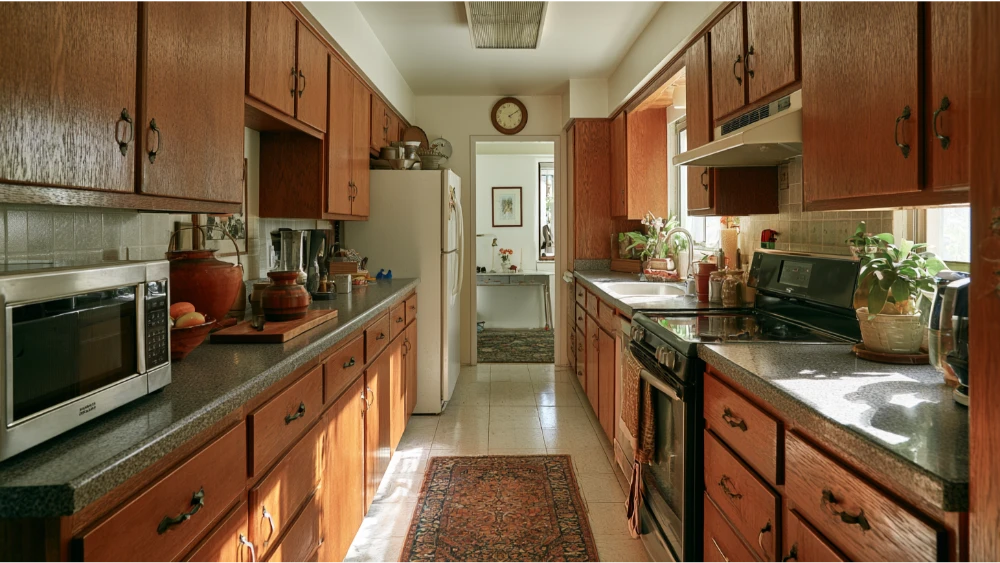
A galley kitchen is a long, narrow layout with parallel runs of cabinets and appliances, usually on both walls, and a central walkway between them. It’s an efficient plan for compact spaces, often working well in a kitchen under 90 square feet. The efficiency is also what makes the space feel tight. Even a tiny galley kitchen can work hard when the plan respects how you move.
Here’s the part most people skip: “open up” doesn’t mean one thing. It can mean a wider physical aisle, clearer sightlines to the next room, more natural or artificial light, less visual heaviness overhead, better appliance flow, or a stronger connection to a dining area. Each of those is a different problem with a different fix. Before you pick an idea off a mood board, figure out which one is actually bothering you about the kitchen. That single decision saves money and prevents remodels that look good but still feel cramped.
Measure First: How Wide Should a Galley Kitchen Aisle Be?
The aisle is the working heart of a galley kitchen, so measure it before you fall in love with any idea. The National Kitchen and Bath Association publishes clear planning targets you can act on:
- 42 inches of work aisle for one cook, measured between counter fronts, tall cabinets, or appliances.
- 48 inches of work aisle when two people cook together.
- 36 inches minimum for a walkway that’s just a passage, not an active cooking zone.
That distinction matters. A 36-inch passage is fine to pass through, but 42 to 48 inches is what keeps a working kitchen comfortable. In practical terms, aim for roughly 4 to 6 feet between countertops where you actually cook.
Then check appliance door swings. An oven door, a dishwasher, and a refrigerator all reach into the aisle when open, and in a narrow galley those swings can collide or block your path. Keep the three main work centers (sink, cooktop, refrigerator) reasonably tight: the total work-triangle distance should stay under 26 feet, with each leg between 4 and 9 feet. Getting these numbers right is the difference between a kitchen that flows and one that fights you.
Open the Sightlines Without Removing the Whole Kitchen
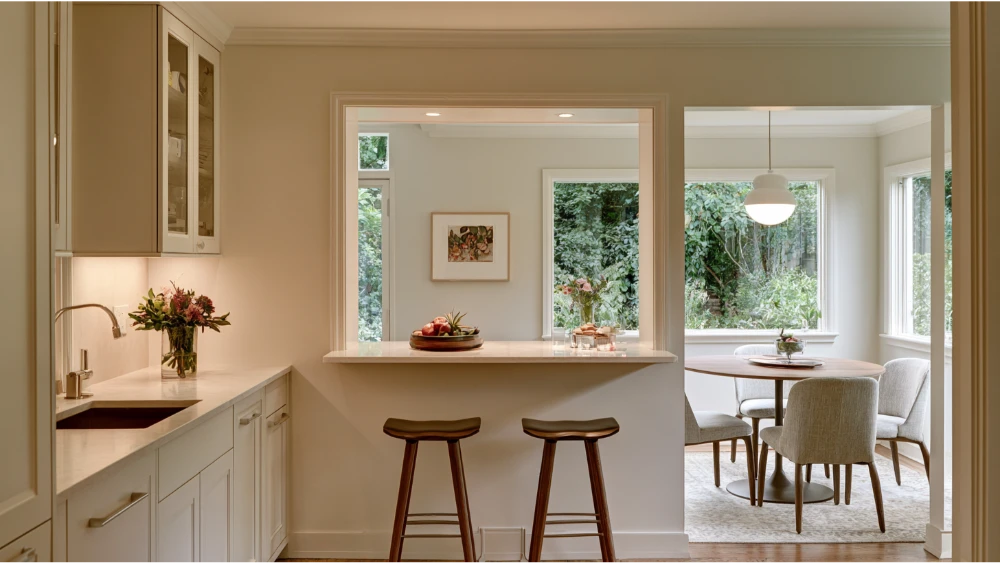
You don’t need to gut the room to make the space feel less like a hallway. Some of the most effective changes are mid-effort and connect the galley to the space beside it, whether that’s a dining room, a living area, or an existing dining space.
- Pass through window: An opening cut into an upper wall lets light and conversation flow into a dining area and breaks the corridor feeling instantly. A pass through window can also double as a breakfast bar with a stool or two on the far side.
- Wider cased opening: Widening a doorway or squaring it into a clean cased opening improves the view in and out.
- Partial wall removal: Taking down the top half of a wall or opening one end can make the kitchen feel far larger without changing the footprint.
- Peninsula instead of a full island: A peninsula gives you a seat or prep surface at the open end while keeping the aisle clear.
Opening a wall increases both natural light and airflow, which is a large part of why galleys start to feel roomy. One warning worth taking seriously: if the wall is load-bearing, it needs proper structural review, and a beam with support posts may be required to carry the load safely. This is the point where a real plan protects you.
Can You Put a Kitchen Island in a Galley Kitchen?
Usually not, and this is where a lot of narrow galley remodels go wrong. An island only works if you can hold that 42 to 48 inch aisle on both sides of it, which most a narrow kitchen simply can’t. Force one in and you shrink your working space while adding a permanent obstacle.
Better options for the same goal: a peninsula at the open end, a slim rolling cart you can move when you need the floor, or a breakfast bar built into a pass through. Each gives you more space for the extra countertop or seating an island promises without choking the aisle.
Use Kitchen Cabinets to Make the Space Feel Taller and Lighter
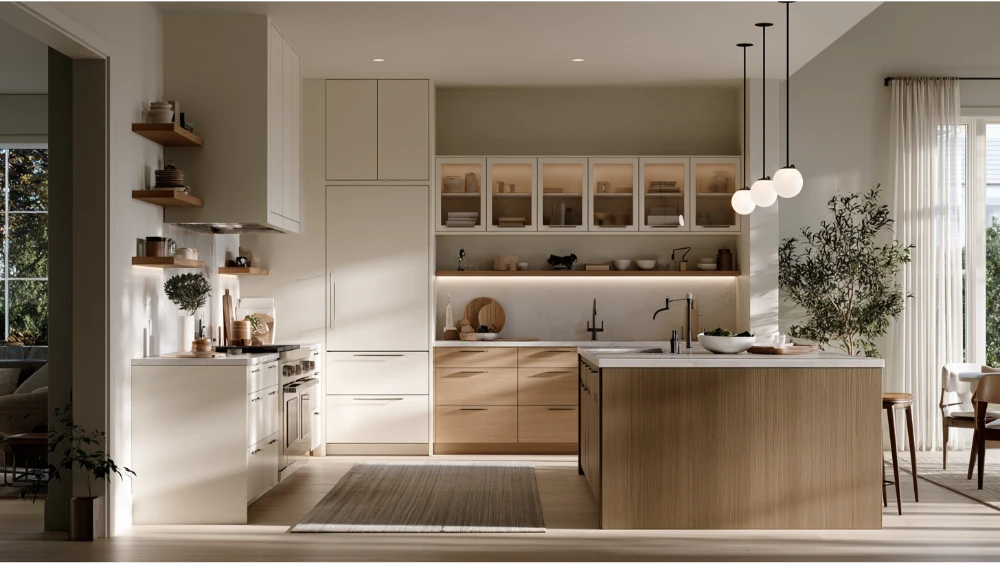
Cabinetry is where you win or lose the tunnel effect. Heavy uppers running down both walls close a galley in fast. A smarter distribution of storage space keeps the room breathing.
- Ceiling-height cabinets on one side capture vertical storage and draw the eye up, so the room reads taller.
- Fewer or lighter uppers on the opposite wall give your eye somewhere to rest instead of a solid box on both sides. White cabinets on that run reflect light and keep the wall from feeling heavy.
- Open shelving or floating shelves where they stay functional let light filter through and create a sense of openness. Open shelves only look airy when they stay uncluttered, so the tradeoff is real.
- Glass-front cabinets keep storage behind doors while adding visual depth.
- A slim pantry cabinet holds a surprising amount without eating aisle width.
- Handleless or touch-latch doors stop hardware from snagging sleeves and hips in a tight aisle. If you want hardware, keep it narrow.
The goal is storage that’s tailored to your space rather than a wall of matching boxes. A cabinet plan built around how you actually move through the room does more for the feel of a galley than any single finish choice. Mixing closed cabinets on one wall with open shelving on the other is a reliable way to keep the room light while still giving you the storage space you need.
Smart Storage Solutions That Add Function Without Adding Bulk
Good storage in a narrow kitchen pulls its weight without stealing floor or aisle space. The trick is designing where things go so the counters stay clear, because countertop clutter is what makes a galley feel cramped. The right smart storage solutions turn awkward gaps into practical space.
- Pull-out pantry: A tall slide-out gives you hidden, organized storage in a footprint that would otherwise waste valuable space.
- Deep drawers instead of low doors: Drawers pull the full contents out so you’re not crouching and reaching into a dark cabinet.
- Vertical dividers for trays, boards, and baking sheets keep flat items upright and easy to grab.
- Toe-kick drawers recover the dead space under lower cabinets for flat, low-use items and give you extra storage space you didn’t know you had.
- Shallow cabinets where depth is tight store more than you’d expect without narrowing the aisle.
- A magnetic knife strip or utensil rail clears the countertop and keeps tools within reach.
Think in landing zones: a spot for prep, a spot for cooking, a spot for cleanup, and a spot for daily storage. When each zone has its own home, these space saving moves let the whole kitchen work harder in the same square footage and maximize storage without crowding the floor.
Choose Appliances and Fixtures That Protect the Aisle
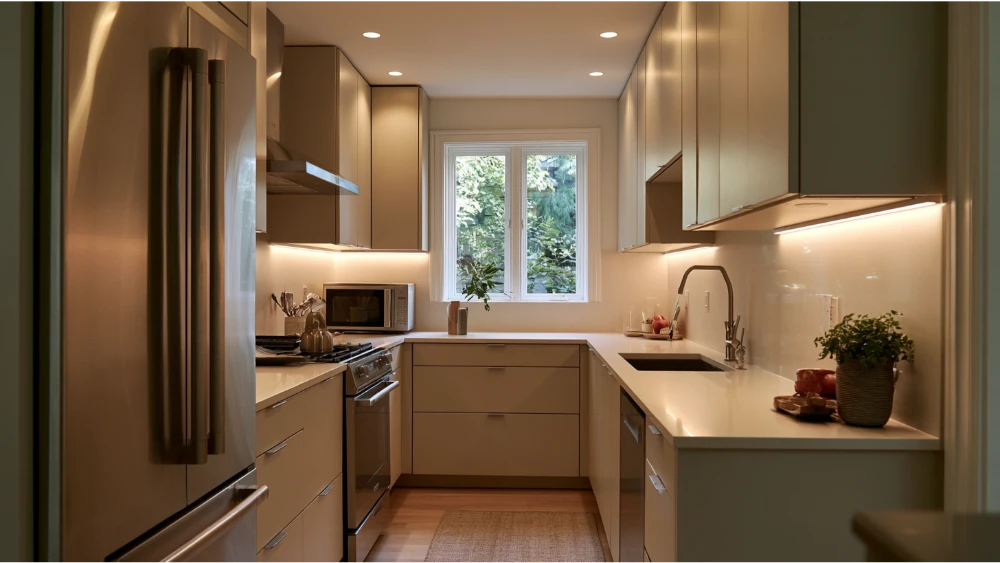
Appliances decide how much of your narrow aisle stays usable. A few choices keep the walkway clear and the look calm, and in a small kitchen even smaller appliances can free up real counter space.
- Counter-depth refrigerator: It sits nearly flush with the cabinets instead of projecting into the walkway, which matters in every inch of a galley. A right-sized fridge protects the aisle better than an oversized one.
- Panel-ready or built-in-look appliances: Fronts that blend with the cabinetry reduce visual clutter and calm the whole run.
- A right-sized sink: An oversized farmhouse sink looks great in photos but eats scarce countertop space. Choose one scaled to the kitchen.
- Drawer or built-in microwave: Getting the microwave off the counter frees prep surface and keeps the countertop clean.
- Thoughtful dishwasher placement: Position it so an open door doesn’t block the sink or the main prep path.
Come back to those door swings from the measuring step. Every appliance door reaches into the aisle, so map where each one lands before you lock in the layout.
Break the Corridor Effect With Light and Finishes
Light does as much heavy lifting as any structural change, and it costs far less. Natural light makes a narrow kitchen read larger, so protect and add a window wherever you can. For everything else, layer it.
- Recessed ceiling lights keep the ceiling plane clean and even.
- Under-cabinet task light brightens the counters where you actually work and removes the shadows that make a galley feel dim.
- Accent light inside glass cabinets or at the end of the run adds depth.
Finishes matter just as much. A satin or gloss backsplash and reflective surfaces bounce light down the run and brighten the whole room. A marble or marble-look surface reflects light well and adds a clean, spacious feel. Reach for light warm neutrals and light wood tones rather than only stark white, which can feel flat. If you want contrast, pairing darker lower units with a light countertop adds interest and depth without overwhelming a small space. Keep the flooring running the length of the galley and hold the material palette consistent so the eye travels without interruption. Then give the room one focal point at the far end, a feature wall or a window, so the space reads as a destination instead of a passage.
Galley Kitchen Layout Fixes to Maximize Space on One Wall
When you can’t widen the room, the answer is a smarter galley kitchen layout. The idea is to maximize space by loading the working functions onto one side and keeping the other lighter and more open. Put the sink, cooktop, and the bulk of your cabinets along one wall, then use the opposite wall for tall storage, a slim counter, or open shelving that keeps the eye moving. Running the heavy work on the same side leaves less space taken up across from it, which is exactly what makes a narrow galley kitchen feel like a real room instead of a hallway.
A single-run layout also frees up the far end for a dining area or a pass through window, which is often where a narrow kitchen gains the most breathing room. If your galley kitchen layout allows it, floating shelves on the lighter wall give you display and everyday storage without the visual weight of full upper cabinets. Small moves like these are what transform a corridor into a space you want to cook in.
Floating Shelves and a Dining Area at the Open End
The open end of a galley is where a house gains a real sense of connection. Floating shelves along the lighter wall add depth without closing the room in, and they hand you display and everyday storage in a footprint that saves space. Pair that with a compact table or a pass through breakfast bar, and you create a dining area that ties the kitchen to the rest of the home. As designer Alexander James notes about tight kitchens, the goal is to let each surface do more than one job. That mindset is how a corridor starts to feel like a place people gather.
What Not to Do in a Narrow Galley Kitchen
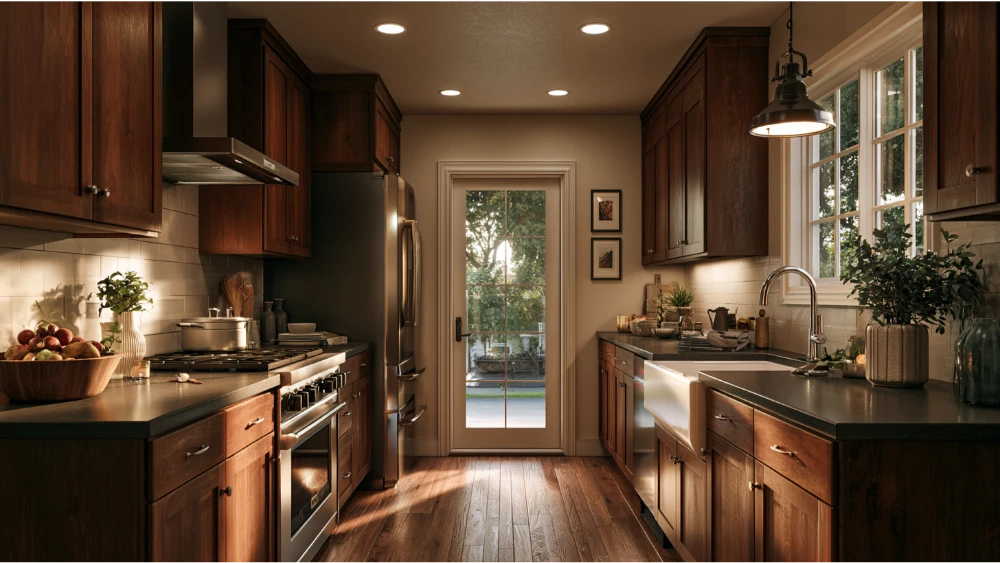
Knowing what to avoid protects your budget as much as any design choice. These are the mistakes we see most often in a narrow galley kitchen:
- Forcing an island into an aisle that can’t hold clearance on both sides.
- Running bulky uppers down both walls with no relief anywhere.
- Choosing dark finishes everywhere without the light to carry them.
- Oversizing the sink, the fridge, or a decorative feature so it crowds the room.
- Ignoring how far appliance doors swing into the aisle.
- Moving plumbing or electrical without a clear functional payoff, since relocation adds cost fast.
- Removing a wall before confirming its structure, the required permits, and what utilities run through it.
Most of these come from copying a look without checking whether the space can carry it. Measure, then decide.
Remodeling a Galley Kitchen in Sacramento: Permits and Planning Notes
If your galley remodel goes past finishes, a few California specifics are worth knowing before demolition day. In Sacramento, building permits are generally required for remodeling and for electrical, mechanical, or plumbing work, and starting work before a permit is issued can carry a penalty fee. Check with the City of Sacramento building department early.
California’s current code cycle is the 2025 Building Standards Code and 2025 Energy Code, both effective January 1, 2026. That affects lighting (dwelling luminaires must meet JA8 requirements) and kitchen ventilation: if you replace a range hood or exhaust fan, it generally must meet or exceed the airflow the prior permit required, or 100 cfm, whichever is greater. Older homes carry an extra step. Homes built before 1978 fall under the EPA’s lead-safe Renovation, Repair and Painting rule, which requires certified work when you disturb painted surfaces beyond the minor-repair thresholds (about 6 square feet inside or 20 square feet outside).
On the paperwork side, California requires a written contract for home improvement work over $500, and the down payment can’t exceed $1,000 or 10% of the contract price, whichever is less. Confirm in writing who pulls permits and what’s included. Requirements vary in Folsom, Roseville, Lincoln, and El Dorado Hills, so verify with your local building department.
When a Galley Kitchen Remodel Is Worth Professional Planning
Some of these ideas are weekend work: swapping hardware, adding under-cabinet light, decluttering a shelf. The moment your project involves wall changes, plumbing relocation, electrical upgrades, a full cabinet reconfiguration, or coordinating finishes across the whole room, a concept-to-completion plan protects both the result and your schedule.
That’s the work we do at Revana Homes. We plan the layout around how you actually cook, keep communication clear from the first measurement to the final walkthrough, and hold to honest pricing and reliable timelines so a narrow kitchen becomes a room you’re glad to stand in. If you’re ready to talk through your galley kitchen, request your free estimate or call (916) 205-5112. There’s no obligation, and it’s the start of a plan tailored to your space.